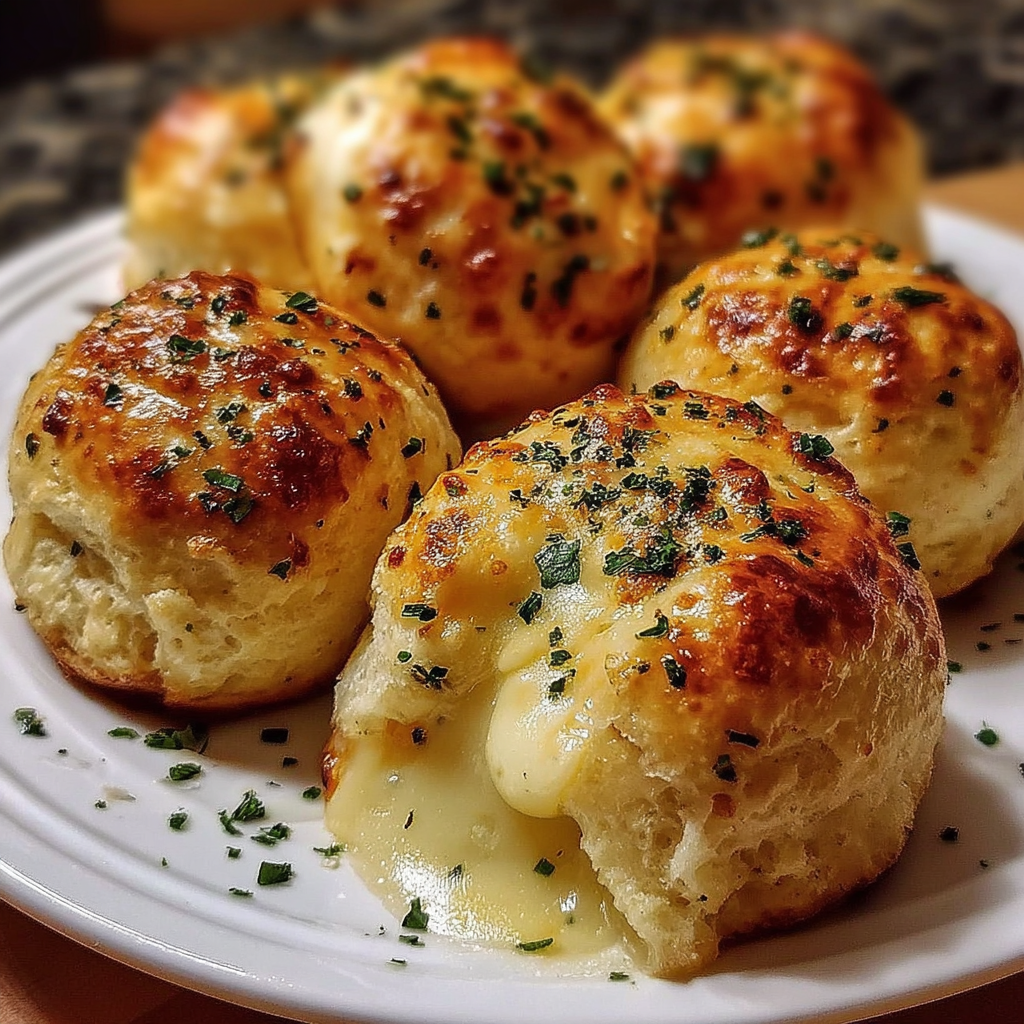
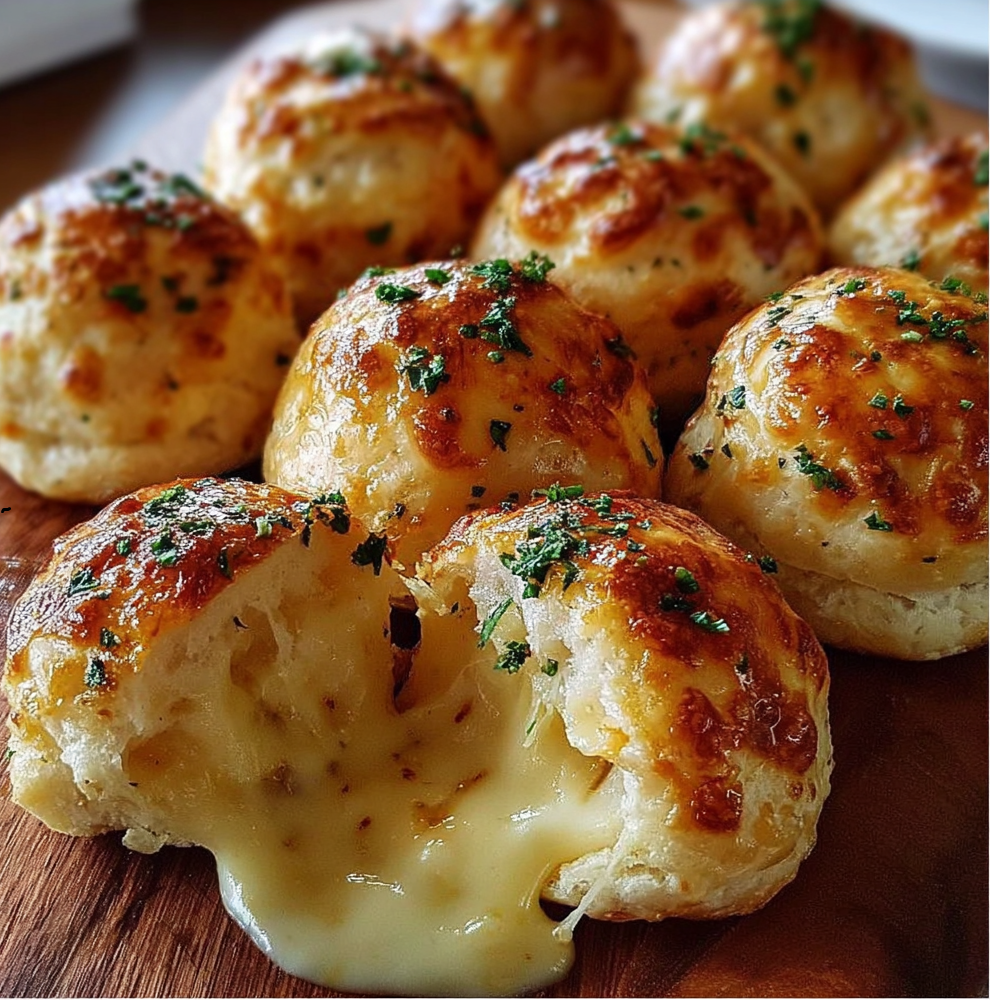
Biscuit Garlic Butter Cheese Bombs
Looking for a crowd-pleasing, cheesy appetizer that’s quick, indulgent, and full of flavor? These Biscuit Garlic Butter Cheese Bombs are your new go-to snack. With only a few ingredients and minimal prep, you’ll have a gooey, golden, and garlic-loaded snack that’s perfect for any occasion—from game day spreads to cozy family dinners.
🔥 Why Everyone Loves These Cheese Bombs
Biscuit Garlic Butter Cheese Bombs are the trifecta of quick, easy, and delicious. What makes them irresistible?
- Buttery, flaky biscuit dough
- Melty, gooey cheese centers
- Garlicky, herb-infused crust
- Customizable with fillings, spices, and dips
They’re basically mini flavor explosions you can eat in two bites.
🧪 Science-Backed Flavor Tip
The type of cheese you choose directly affects texture and meltability. For the perfect pull, opt for low-moisture mozzarella or even a blend of mozzarella and cheddar. Learn more about how cheese melts during baking in this scientific breakdown of cheese behavior.
🧈 What You’ll Need (Ingredients & Substitutions) For Biscuit Garlic Butter Cheese Bombs
Here’s your flavor arsenal:
- 1 can Pillsbury biscuit dough (or any refrigerated biscuit dough)
- 8 oz mozzarella cheese, cubed
- 4 tbsp unsalted butter, melted
- 3 cloves garlic, minced
- 1 tbsp fresh parsley, chopped
- ½ tsp Italian seasoning
- Optional: Grated Parmesan, red pepper flakes, or thyme
🔄 Need Substitutions?
- Use vegan cheese and vegan biscuit dough for a plant-based version.
- Gluten-free biscuit dough is available in most health food stores.
Storing ingredients safely is key to flavor and food safety. Check these USDA food safety guidelines for handling refrigerated dough and dairy products properly.
🧑🍳 Step-by-Step Instructions Of Biscuit Garlic Butter Cheese Bombs
Let’s walk through exactly how to make these garlic butter cheese bombs from scratch:
1. Prep the Oven & Ingredients
- Preheat your oven to 375°F (190°C).
- Mix melted butter, minced garlic, Italian seasoning, and parsley in a bowl.
2. Prepare the Biscuit Dough
- Open the can and separate the biscuits.
- Flatten each biscuit to a ¼-inch circle using your hands or a rolling pin.
3. Stuff with Cheese
- Place a cube of cheese in the center of each dough round.
- Fold the edges over the cheese and pinch tightly to seal. (No one wants a leaky bomb!)
4. Coat in Garlic Butter
- Roll each sealed ball in the garlic butter mixture.
- Place seam-side down on a parchment-lined baking sheet.
5. Bake to Golden Perfection
- Bake for 12–15 minutes, or until puffed and golden.
- Brush with leftover garlic butter and top with optional Parmesan or herbs.
💡 Expert Tips for Perfect Biscuit Garlic Butter Cheese Bombs
Want to take your Biscuit Garlic Butter Cheese Bombs from good to unforgettable? These expert tips will help you master the recipe like a pro and impress every guest at the table.
✅ 1. Freeze the Cheese Before Stuffing
Slightly freezing the cheese cubes for 10–15 minutes helps them hold their shape longer during baking. This prevents early melting and leakage, giving you that perfect gooey center.
✅ 2. Use Low-Moisture Cheeses
Avoid watery cheeses that can make the dough soggy. Instead, go for low-moisture mozzarella, cheddar, or Monterey Jack—they melt beautifully and keep the inside creamy, not runny.
✅ 3. Don’t Skip the Second Butter Brush
Once the bombs are baked, give them a second brush of garlic butter while they’re still hot. This not only adds shine but also boosts the garlic flavor and makes the surface extra luscious.
✅ 4. Add Fresh Herbs for Flavor Depth
Mix in chopped parsley, thyme, or even a little rosemary with your butter for added aroma. Fresh herbs elevate the overall flavor and presentation.
✅ 5. Bake on Parchment Paper or a Silicone Mat
To avoid sticking and ensure even browning, line your baking sheet. This also makes cleanup a breeze.
✅ 6. Serve Immediately
Cheese bombs are best enjoyed hot and fresh. The texture and flavor peak when the cheese is still molten and the biscuit is fluffy.
By following these tips, your cheese bombs will always be crispy outside, melty inside, and full of bold garlic-butter flavor.
🧀 Creative Variations
These biscuit bombs are a blank canvas. Here’s how to remix them:
🧂 Cheese Twists
- Cheddar for sharpness
- Gouda for smoky richness
- Pepper jack for a spicy edge
🥓 Add-Ins
- Crispy bacon bits
- Pepperoni slices
- Cooked shredded chicken
🌶 Spicy Lovers
- Sprinkle in red pepper flakes
- Add chopped jalapeños for heat
🍫 Sweet Switch-Up
Want dessert bombs? Fill the dough with:
- Nutella
- Caramel sauce
- Chocolate chips
Brush with butter, sprinkle with cinnamon sugar, and bake as usual!
🍽 Serving Suggestions
Biscuit Garlic Butter Cheese Bombs are incredibly versatile and shine in a variety of settings—from casual snacks to festive party platters. Here’s how to serve them for maximum flavor and impact.
🧺 Perfect for Any Occasion
These cheesy delights are ideal for:
- Game day snacks
- Potluck appetizers
- Holiday hors d’oeuvres
- After-school treats for kids
- Cozy movie night munchies
Their bite-sized shape makes them easy to grab, dip, and devour—no utensils required.
🥣 Dipping Sauce Ideas
Level up your cheese bombs with bold dipping sauces:
- Marinara Sauce – Classic Italian combo that complements the cheese and garlic.
- Ranch Dressing – Cool and creamy contrast that balances the richness.
- Spicy Sriracha Mayo – For a little heat and zing.
- Honey Mustard – A sweet-tangy twist that pairs surprisingly well.
Serve dips in small ramekins on the side for variety and visual appeal.
🍽 Platter Pairing Inspiration
Create a full appetizer spread by pairing your bombs with other finger foods like:
- Chicken wings, sliders, or onion rings
- A colorful veggie tray with hummus or tzatziki
🧊 Serving Temperature Tip
For best texture and taste, serve cheese bombs hot out of the oven. If prepping ahead, reheat in a 350°F oven for 5–7 minutes before serving.
With these suggestions, your cheesy snack will steal the spotlight every time.
🧊 Make Ahead, Store & Reheat Biscuit Garlic Butter Cheese Bombs
⏳ Make Ahead Tips:
- Assemble and refrigerate unbaked bombs up to 24 hours in advance.
- Cover tightly to prevent drying.
🥶 Freezing Instructions:
- Freeze unbaked bombs on a tray until solid, then transfer to a freezer bag.
- Bake directly from frozen; just add 3–4 minutes to cook time.
♻️ Reheating:
- Oven: 350°F for 5–7 minutes for crispy outsides.
- Microwave: 30–60 seconds if you’re in a rush (but they’ll be softer).
📊 Nutritional Snapshot (Per Cheese Bomb)
Approximate values based on mozzarella and standard biscuit dough
- Calories: 180–200
- Fat: 10–12g
- Carbs: 16–18g
- Protein: 5–6g
- Sodium: 400–450mg
🥗 Want It Healthier?
- Use reduced-fat cheese and dough.
- Swap butter for olive oil.
- Add a small spinach leaf with the cheese for extra nutrients.
❓ FAQs About Biscuit Garlic Butter Cheese Bombs
Q: Can I use crescent or pizza dough instead?
A: Yes! Crescent rolls are flakier, while pizza dough gives a chewier bite. Just adjust baking time accordingly.
Q: How do I stop cheese from leaking out?
A: Pinch seams tightly, and place seam-side down. Don’t overfill with cheese.
Q: Can I make these ahead and reheat later?
A: Definitely. You can assemble the day before or reheat baked ones at 350°F for 5–10 minutes.
Q: Are they freezer-friendly?
A: Yep! Freeze unbaked or baked versions. Reheat in the oven for best results.
Q: What’s the best cheese to use?
A: Mozzarella for melt, cheddar for flavor, pepper jack for spice. Avoid crumbly or dry cheeses.
🚫 Common Mistakes to Avoid
Even though Biscuit Garlic Butter Cheese Bombs are beginner-friendly, a few simple mistakes can make the difference between gooey perfection and a kitchen flop. Here’s what to avoid:
❌ 1. Not Sealing the Dough Properly
Failing to pinch the edges of the biscuit dough tightly will cause the cheese to leak out during baking. Always press the seams firmly and place the sealed side down on the baking tray for added security.
❌ 2. Overstuffing with Cheese
It might be tempting to load in more cheese, but too much can break the dough open or overflow. Stick to about 1 tablespoon of cheese per biscuit to ensure a melty center without mess.
❌ 3. Skipping the Garlic Butter Brushing Step
The garlic butter isn’t just for flavor—it helps the bombs get that golden, crispy finish. Skipping this step can result in dry tops and a lackluster appearance. Brush once before baking and again right after for maximum flavor.
❌ Using the Wrong Cheese
Some cheeses don’t melt well or are too oily. Avoid crumbly cheeses like feta or overly processed singles. Instead, opt for mozzarella, cheddar, or blends designed for melting.
❌ Overbaking or Underbaking
Too much time in the oven will dry out the dough; too little and the centers may be raw. Bake at 375°F for 12–15 minutes and check for a golden-brown finish.
By dodging these common pitfalls, you’ll create perfect cheese bombs every time—crispy on the outside, gooey inside, and full of irresistible garlic flavor.
🎉 Final Thoughts: Biscuit Garlic Butter Cheese Bombs
Biscuit Garlic Butter Cheese Bombs are the ultimate combination of flavor, ease, and versatility. Whether you’re hosting a party, prepping a quick snack, or craving something warm and cheesy, these little bombs deliver on every front. The flaky biscuit dough wrapped around gooey, melted cheese and brushed with rich garlic butter creates a crowd-pleasing bite that’s impossible to resist.
What truly sets this recipe apart is its flexibility. You can easily tailor it to your preferences—swap in your favorite cheeses, add proteins like bacon or pepperoni, or even create sweet versions with chocolate or caramel. Plus, they’re quick to prepare and reheat beautifully, making them ideal for busy weeknights or make-ahead appetizers.
Pair them with dips like marinara or ranch, and serve alongside other crowd favorites like cheesy garlic chicken wraps or crispy fried mac and cheese balls for a next-level spread.
So the next time you’re looking for a recipe that’s simple, satisfying, and sure to impress, give these cheese bombs a try. You’ll love how quickly they disappear—just be sure to make extra, because one is never enough!